Showing posts with label DESSERT. Show all posts

Monday, February 14, 2011

Valentine's Day Cookies

I have been trying to practice my skills at decorating cookies, and I thought I'd try out a new royal icing recipe that my cousin shared with me (not to mention a yummy, super easy sugar cookie recipe, too!). The whole "outlining" and "flooding" tasks were very new to me, but I just had to try it! And it wasn't too hard! Here's what I came up with...


Not too shabby, eh?

Here are the two recipes I used for the cookies and icing.

ROLLED SUGAR COOKIES

Ingredients:
*3 cups all-purpose flour
*1/2 teaspoon salt
*1 cup (2 sticks) unsalted butter, softened
*1 cup sugar
*1 large egg
*2 teaspoon vanilla
*food coloring (if you want to dye your dough!)

1. Whisk together the flour and salt in a medium bowl.

2. Cream together the butter and sugar with your mixer until light and fluffy. Add the egg and vanilla and mix until well blended.

3. With the mixer on low, gradually add the flour mixture to the butter mixture until the two are thoroughly blended. If your design calls for adding food coloring, do so now, and blend well.

4. Turn the dough onto a work surface and divide into two or three equal portions. Form each one into a rough disk. Now you're ready to roll, chill, and cut out cookie shapes. NOTE: It's best to form dough into a disk and roll out onto wax paper. Cover the top with wax paper as well and put in fridge to chill for 20-30 min. Using the wax paper helps with less mess [no flour to use!] and makes it easier to roll. The dough will be nice and smooth and the wax paper will peel off easily when chilled.

5. Preheat the oven to 350 degrees.

6. After you've rolled and cut the dough and the coolie shapes are on parchment-lined cookie sheets, bake them in the middle rack of your oven for 12-16 minutes or until the cookies start to turn slightly golden around the edges.

7. Cool the cookies completely before icing!


ROYAL ICING
**
Ingredients:
*4 tablespoons meringue powder
*scant 1/2 cup water
*1 pound powder sugar
*1/2 - 1 teaspoon light corn syrup (optional- helps add shine to icing!)
*few drops of clear extract for flavor (optional. i like to use lemon juice)

1.Combine the meringue powder and water. Beat until combined and foamy with electric mixer.

2. Sift (important!!) in the powdered sugar and beat on low to combine.

3. Add in the corn syrup and extract if desired.

4. Increase speed to med-high/high and beat for about 5 minutes, just until the icing is glossy and stiff peaks form. Don't overbeat!

5. Cover with plastic wrap touching the icing or divide and color using gel paste food coloring and start decorating!

**This recipe is perfect for outlining your cookies. Once you've outlined, add a small amount of water until icing is smoother, and use that to flood your cookies- once your outline is dry, of course!


After I made all the cookies and iced them, I let them sit for a day before packaging them up! I used a super cute print-out from I Heart Faces to decorate the bags. (Become a fan of hers on facebook and it's free in her Exclusive tab!) Instead of adding a picture, I left the circle gray and wrote names in the empty space. Once that was done, I passed them out to friends and family and tried not to steal any for myself...
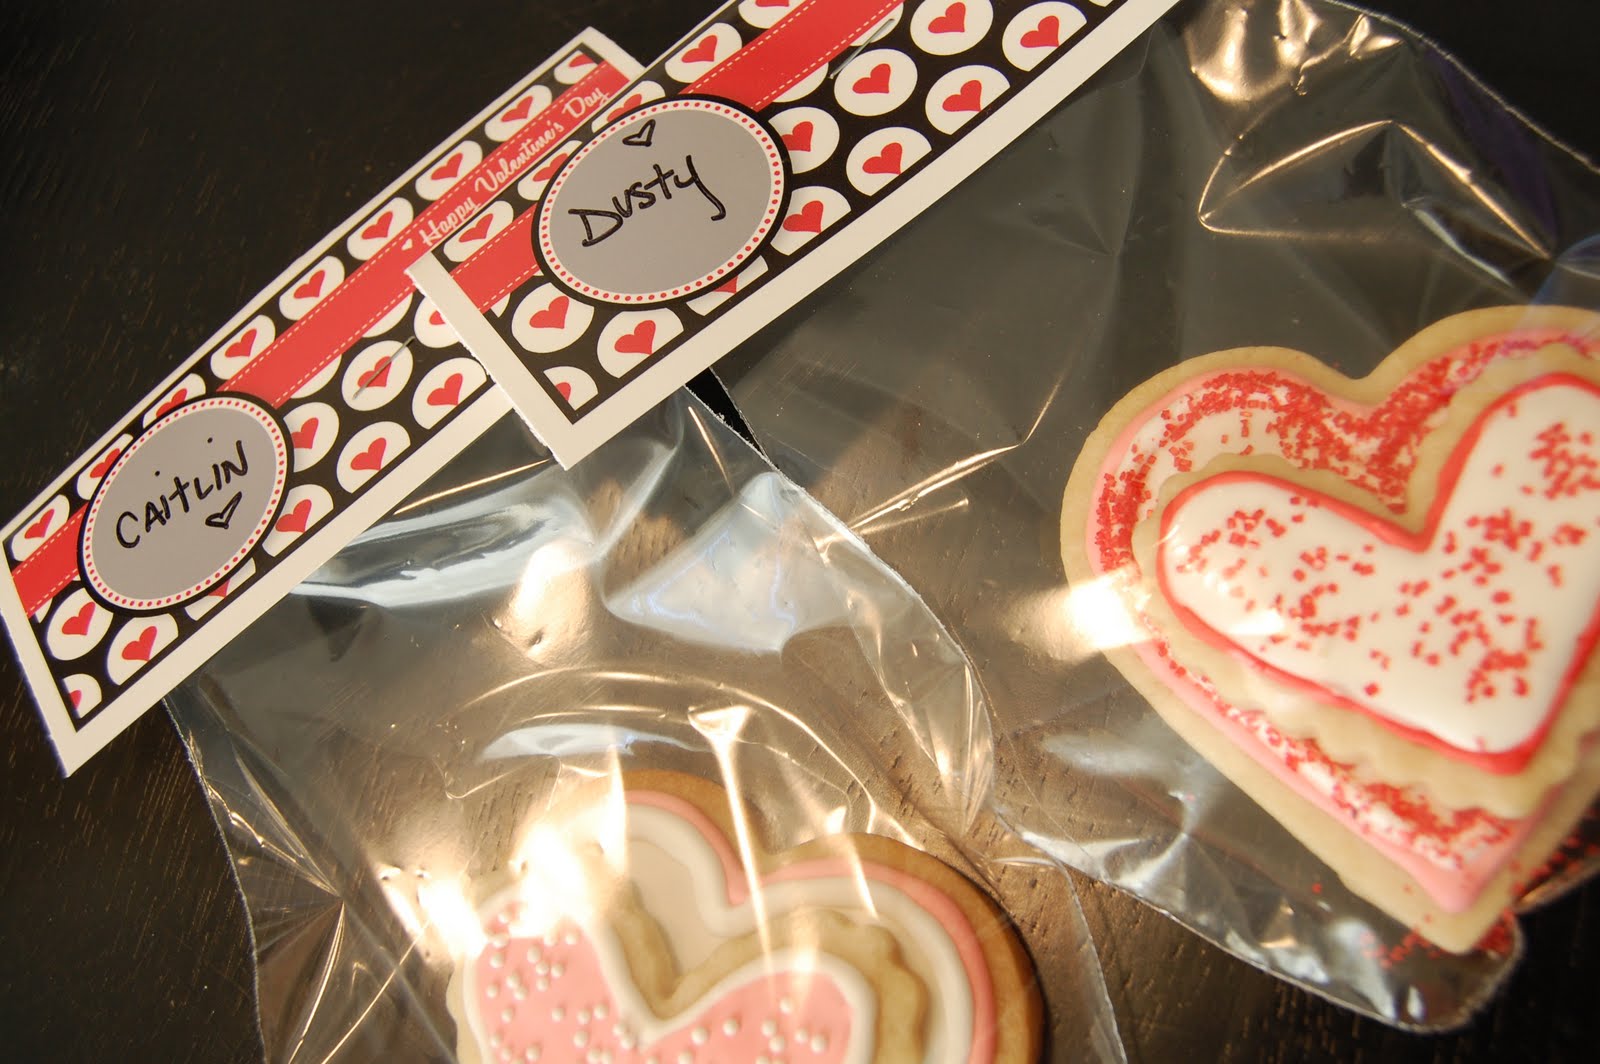


CREDITS: Rolled Sugar Cookie Recipe came from Cookie Craft Christmas and the royal icing recipe came from Bake at 350.

Ready For Spring!


I found a recipe the other day for strawberry lemonade cookies. I was immediately salivating and I just HAD to make them. So tonight I took the challenge and produced some very pink cookies! They are very sweet and very tarty and totally easy to make! If you're a strawberry lover, this is a pretty great cookie, but unfortunately for me, I'm not too huge on the mix. But I'm still glad I made them, and I think they will grow on me as I continue to eat the pile of cookies in my kitchen! I think the icing is super yummy and would be great on a simple sugar cookie or even a plain lemon cookie. Also, next time I make them, I'm going to try half strawberry and half vanilla cake mix to tone down the strawberry flavor! NOTE: these would make a super-duper cute addition to a pink baby shower or birthday party! Definitely a feminine cookie!

Want to try them out yourself? Here's the recipe!

For the cookies:
* Strawberry cake mix
* 1 stick butter, softened
* 2 eggs
* 1 tsp. vanilla
* 1 Tbs. water
* 1/2 cup pink lemonade mix

Combine all the ingredients in a bowl and beat with a mixer till well blended. Drop by teaspoons onto a baking stone or cookie sheet. Bake at 350 degrees for 8-10 minutes.

For the frosting:
* 1 1/2 cups powdered sugar
* 3 Tbs. pink lemonade mix
* 3 Tbs. soft butter
* 1-3 Tbs. milk

Stir the powdered sugar and lemonade mix together in a small bowl. Stir in the butter. Add the milk gradually, until the frosting reaches a spreadable consistency. You want it thick, but smooth enough to spread. Frost cooled cookies.

(And thank you, Tiffany for the recipe!)

Friday, December 11, 2009

Dark Chocolate/Mint Morsel Chocolate Cookies!


Try saying that three times fast!

These cookies are really simple and really good! During the holiday season Nestle always had a great assortment of morsels to chose from and the Dark Chocolate and Mint morsels add quite a kick to this cookie! But you can always use regular semi-sweet chips and they will taste great too! Here's the simple recipe:

INGREDIENTS:
2 cups all purpose flour
3/4 cup cocoa powder
1 teaspoon baking soda
1/2 teaspoon salt
1 cup (2 sticks) butter or margarine, softened
2/3 cups granulated sugar
2/3 cups packed brown sugar
1 teaspoon vanilla extract
2 large eggs
1 3/4 cups of your choice of morsel

BAKE IT:
Preteat oven to 350 degrees

Combine flour, cocoa, baking soda, and salt into medium bowl. Beat butter, sugar, brown sugar, and vanilla in large mixer bowl until creamy. Add eggs, one at a time, beating well after each addition. Gradually beat in flour mixture. Stir in morsels. Drop by rounded tablespoon onto ungreased baking sheet.

Bake for 9 - 11 minutes or until cookies are puffed and centers are set but still soft. I like to bake mine for 9 minutes- they seem to be very moist and soft! Cool on baking sheet for 2 minutes; remove to wire racks to cool completely.

Tuesday, November 3, 2009

Candy Coated Red Velvet Truffles


Now the name may be a mouthful, but I can guarantee you this treat is nothing but a mouthful of Heaven. I cannot believe how many compliments and requests I get for these delightful finger desserts! It many not be as easy as chocolate chip cookies, but it's worth the time and effort. Thankfully one batch makes about 60- so you're covered for quite a while!

Here's how to make these great treats!

Item Needed:
*1 box Red Velvet Cake Mix (plus ingredients on box to make the cake)
*1 can cream cheese frosting
*2 to 3 14 oz bags of chocolate chips (or candy melts- I used 3 bags of colored candy melts for the orange and black candy for the picture above)
*vegetable oil (if needed for thinning out candy melts)

Make it:

Mix and bake your red velvet cake as directed on box.

Once cooled, crumble cake into large mixing bowl.


Add entire can of frosting to bowl- mix until blended!


Roll mixture into half inch balls with your hands and place onto cookie sheet.


Once mixture is used up and you have rolled all the balls, place cookie sheet into freezer for 30 min, or fridge for up to 2 hours to allow cake balls to firm.


Once firm, melt 1 bag of chocolate in a bowl. Heat in increments of 30 seconds- stirring in between (or as bag directs). Make sure it melts to a consistency that drips when you run a fork through the candy. If it's still too thick, add a few drops of vegetable oil until thinned out.

I wasn't able to get pictures of the dipping process since I was by myself- but I will try to explain as best as I can!

Drop a cake ball into melted candy. Spoon candy over cake ball so it covers it completely. Using a fork, lift it out of the bowl- letting the excess candy drip from the fork. Poke with toothpick and drop onto a cookie sheet topped with wax paper. If you want to use sprinkles, act fast, and sprinkle after every 2 to 3 cake balls as the candy coat hardens quickly. Try to allow as much candy coating to drip off so the melts last longer and go further.

Once all cake balls are dipped, allow to harden at room temperature, or stick in fridge. Just to warn you- if you put them in the fridge, the candy coating may not look as smooth or may look cracked. It's not hugely noticeable, but something worth noting.

One candy hardens- serve them, eat them, or give them away at gifts!

Tuesday, September 22, 2009

Brownie Candy Cups


These are another awesome sweet treat from Bakerella. Be warned. They are like super duper amazing Reeses Pieces Cups. So if you like Reeses, you'll love these. I guarantee it.

These are much easier than the last post, so be relieved. They only take a mere 35 minutes.

I tweaked Bakerella's recipe a bit to fit my normal person's list of house cooking items. I don't have mini cupcake pans or foil liners. So, I just used what I had. And here's what I did. And here's how to make them. Oh, and they turned out amazing. Did I mention that yet?

Items Needed:

1 box of Duncan Hines Chocolate Lovers Double Fudge Brownie Mix
2 eggs
1/3 cup water
1/4 cup vegetable oil
20 regular sized Reeses cups unwrapped
20 cup cake liners

How to Create Deliciousness:
1. Preheat oven to 350

2. Place liners in your cupcake pan, or use free-standing liners like my beautifully colored silicone liners.


3. Combine brownie mix, contents from fudge packet in mix, eggs, water and oil.


4. Stir with spoon until blended.

5. Fill each liner about one third of the way. You can fill them higher if you want more brownie, but you'll make a less amount. The brownie mix doesn't raise very high like regular cupcakes do.


6. Bake at 350 for 15 minutes and remove from oven

7. Push 1 Reeses in center of each “brownie cupcake” until even with surface of the batter.


8. Bake 5 more minutes.

9. Remove pan and allow pan to cool for about 5 minutes. I placed them into the fridge to harden up the melted chocolate, and then removed them from the liners once they were cooled.


10. Serve and eat!!

Tuesday, August 18, 2009

Holiday Baking

Usually "Holiday" refers to the Christmas season, but we're not quite there yet, and I'm way behind on my blogging. So this Holiday post refers to the wonderful day we celebrate our fathers. I know, it's August. I'm late... way late. But I couldn't pass it up to share these SUPER cute cookie/cupcake/brownie desserts that everyone will love.


Unfortunately I can't say this is the easiest and quickest baking experience, but if you have a few hours, and you enjoy baking, it's totally worth it. Not to mention their extreme cuteness.

The hardest part I had was balancing the mixing, stirring, baking, cutting, decorating all at the same time. You need to be able to cook brownies, cupcakes, and sugar cookies, which is why it's not the simplest project. But you can even spread the baking over two days if you wish to keep sane and have a somewhat decently clean kitchen.

Of course I found this awesome idea from none other than the awesome Bakerella. She is amazingly creative. Here is her post, and it's way better than mine. So maybe don't look at it just yet...

Before you start baking you'll need to print out some templates from Bakerella for the tray, french fry holder, and tissue paper. I printed the trays on card stock, french fry holders on vellum, and the father's day paper on tracing paper. Just be careful if you use the tracing paper, it can smear if it's not dry.

Once you have printed those out, start baking! I'd suggest starting with the brownies first. They are the easiest and allows them to cool for cutting. While they are baking, start cutting and assembling the trays and fry holders.

Secondly, bake your cup cakes. I definitely recommend using paper cupcake liners as opposed to none or the silicone cupcake liners. These are the ones I baked with the silicone liners.


Sure, they look good in the liners, but once they are peeled off, they look better in the trash.


They got destroyed. So, as I mentioned before, paper is better for this project. After we said our eulogies, we started round two of the cupcakes, and they turned out much better. Just let them cool before peeling off the paper liners.

Your next step is making the delicious french fries. These are made with the sugar cookie dough. Make your dough (from scratch, or if you want to have a life, use a mix). Spread the dough out on parchment paper or on a silicone mat. Cut the dough in small strips with a long cut down the center, hot dog style (remember that from kindergarten?). I failed to remember to take pictures of the french fry steps, so please refer to Bakerella if you need help. She has some great visuals. Remove alternating strips so it won't bake into one giant cookie. (See example) Sprinkle on sugar, and bake for about 8 minutes in a 350 degree oven. If they spread out too much and become steak fries, you can immediately cut them in half as soon as you take them out of the oven. If you wait too long they will harden and break. So slice fast! Once the fries are done, load 'em up in their cute holders and refrain from eating them all.


Once your cupcakes are cooled, cut them in half. These will be used as the buns. Then cut your brownies to be the meat- using a cookie cutter that's similar diameter as the cupcakes. Or, if you're ghetto like me, you can use the top of a PAM spray can. I didn't have a two inch circle cookie cutter, so the PAM top worked like magic.


Now comes the decorating part! You'll need one can of frosting as well as green, red, and yellow food coloring. Separate icing in to three bowls, one bowl using a bit more than the other two. The bowl with more frosting will be used for the lettuce since you'll need more green than yellow or red. SO mix the colors until you are satisfied with your lettuce, mustard, and ketchup. Place the icing in piping bags, or you can use plastic sandwich bags, cutting small holes at the tip of a corner. Now decorate your "meat" with delicious mustard, ketchup and lettuce.


Last but least, assemble your burger, placing the meat in the buns, and pressing lightly so they stick together a bit. Just don't squish too much or your beautiful lettuce will look more like mold. For the finishing touch, dip your finger in water, and lightly rub the top of the bun with the water and sprinkle sesame seeds. The water helps them stick.


Place the burger in a tray with the tissue paper, pair it with a bag of fries, and you've got yourself one darn delicious happy meal!

Tuesday, August 11, 2009

A Heavenly Combo


I found this recipe on Bakerella which she found from Betty Crocker. The thing I like the best about this recipe is it's SOO easy and SOO good. Want a super easy recipe that will taste like you spent extra time? This is totally the answer.

WHAT YOU NEED:
One box of brownie mix (and the water, eggs and oil it calls for)
One tube of pre-made chocolate chip cookie dough
Extra chocolate chips (optional)
Confectioners Sugar (optional)


And that's it!! If you want to make things harder on yourself, you can make the cookie dough from scratch, but that just seems foolish.

DIRECTIONS:
Heat your oven to 350 degrees.

Mix brownie mix together according to the box directions. Pour mixture into a greased 13 x 9 pan or greased glass dish.


Remove the cookie dough from it's package and make balls or scoops like you would if you were making regular cookies. Drop the cookies into the brownie batter, pressing lightly so it squishes it a bit into the batter.


You might not need to use all the cookie dough, so if there's extra, don't let it go to waste- let is go to your waist! Anyways, after you've devoured the left over cookie dough, place your delicious pan of goodness into the oven, and bake for 35- 40 minutes.


Now you have a few choices. You can leave it be, and enjoy the delicious creation you just made just as it is, or you can add toppings. Bakerella did a chocolate ganache topping, but I thought it was too much work. So I just topped with extra chocolate chips once it was out of the oven, so they'd melt a bit. Once it was cooled, I sprinkled with confectioners sugar. I'm sure you could even frost it like a cake, but that'd be a bit too much for my personal pallet. Once it's cooled, serve as is, or cut into pieces and display proudly!